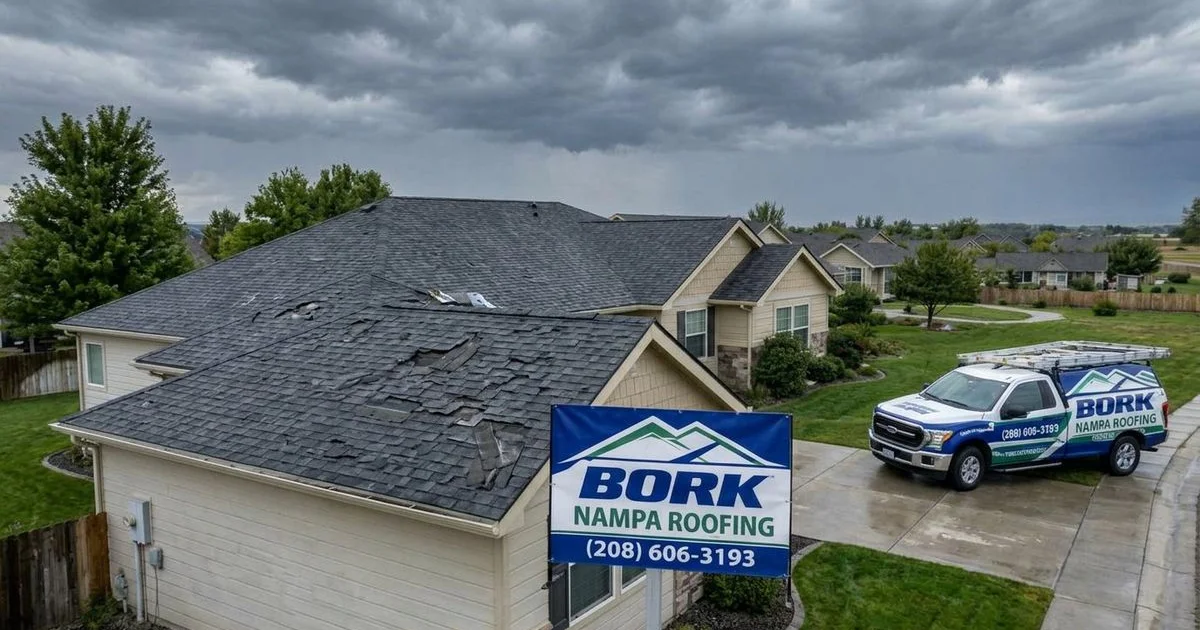
To a homeowner standing in the yard, a roof often looks perfectly fine even after a serious storm. You might see a few branches down, but if the shingles aren’t physically missing, it’s easy to assume everything is safe.
However, wind damage is rarely that obvious in the beginning.
In our experience, the most expensive roofing problems usually start with “invisible” wind lift that goes unnoticed for months.
Nampa and the Treasure Valley are famous for these deceptive wind events. We see gusts hit the 40 to 60 mph range during spring transition storms, which is strong enough to compromise adhesive seals without tearing the shingle off the roof immediately.
Knowing how to spot these subtle early signs is the difference between a simple repair and a full roof replacement.
Why Wind Damage Is Often Invisible
Wind doesn’t just push against your roof; it creates a vacuum that pulls it up.
When wind moves over the eaves and ridges, it generates negative pressure—essentially suction—that tugs at the shingles. This force is powerful enough to break the thermal sealant strip (the “glue” that holds shingles together) even if the shingle lays back down flat afterwards.
Once that bond is broken, the clock starts ticking.
Dirt and dust from the Treasure Valley’s dry climate will quickly blow into the gap, coating the adhesive. This “mat transfer” prevents the shingle from ever sealing down again, leaving it flapping loose during the next storm until it eventually tears off.
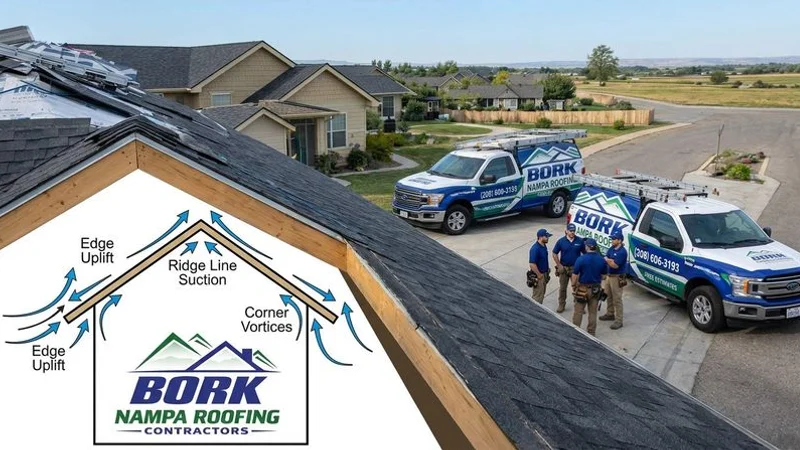
The “Zone of Destruction”
Wind pressure is not uniform across your entire roof.
Engineers divide roofs into three distinct zones based on how much uplift force they endure. Understanding this helps you prioritize where to look during your inspection.
| Zone | Vulnerability Level | Wind Pressure Factor |
|---|---|---|
| Zone 3 (Corners) | Critical | Highest suction force (often 2-3x more than the center). Inspect these areas first. |
| Zone 2 (Perimeters) | High | The 3-4 foot strip along all eaves and rakes. This is where “zippering” usually starts. |
| Zone 1 (Field) | Moderate | The center of the roof. Damage here usually indicates extremely high wind speeds or old, brittle shingles. |
7 Critical Signs of Wind Damage (Inspection Checklist)
You don’t need to climb a ladder to spot many of these warning signs. We recommend grabbing a pair of binoculars and scanning your roof from the ground, preferably on a cloudy day to reduce glare.
1. The “Zippering” Effect
This happens when a row of shingles lifts slightly, looking like an unzipped zipper. It usually starts at the edge (Zone 2) and works its way inward. If you see a dark line or shadow underneath a row of shingles that should be flat, the seal has failed.
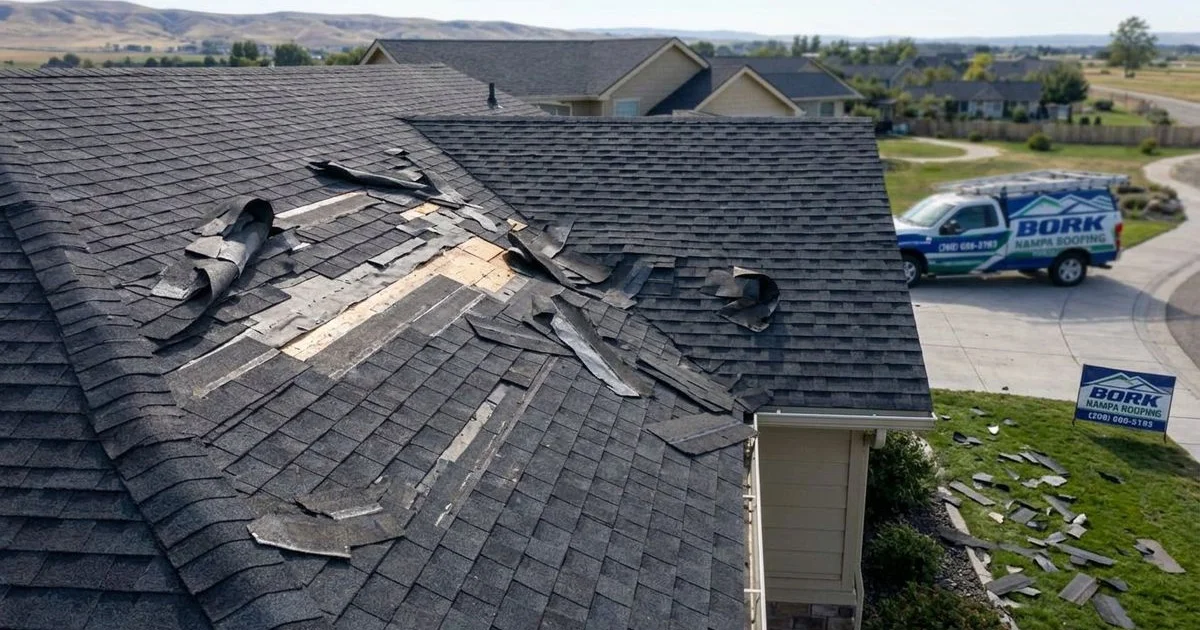
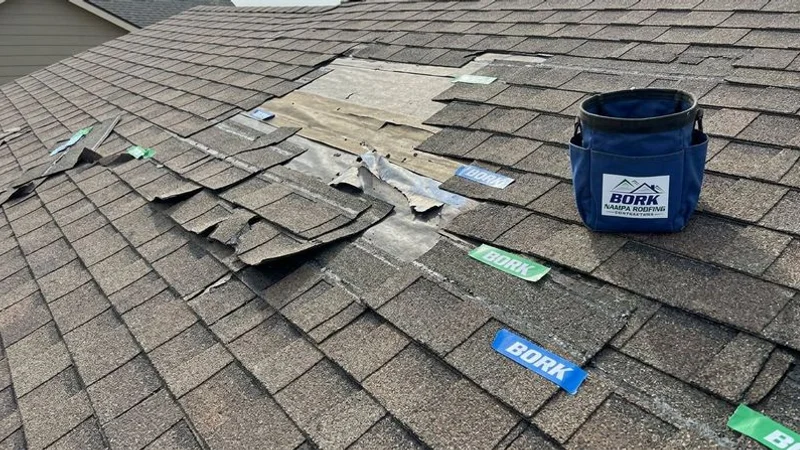
2. Creased or Folded Shingles
When a shingle flaps in the wind but doesn’t tear off, it creates a sharp horizontal crease near the top. This crease acts like a hinge, cracking the fiberglass mat. These shingles are effectively ruined and cannot be repaired—they must be replaced.
3. Excessive Granule Loss
Check your gutters and downspouts for an accumulation of ceramic granules (they look like coarse black sand). While some loss is normal for aging roofs, a sudden pileup after a storm often means the wind has “scrubbed” the shingle surface or flapped them together, dislodging the protective coating.
4. Exposed Roof Decking
This is the most urgent sign. If you see the wooden deck or dark underlayment paper, your home has zero protection against the elements. UV rays can destroy waterproof underlayment in a matter of days, so this requires immediate emergency tarping.
5. Nail Withdrawal (Popped Nails)
High winds can cause the entire roof deck to flex, which sometimes pushes nails up through the shingles. From the ground, this looks like a small bump or a “pimple” on the shingle surface. A popped nail breaks the shingle’s water seal and creates a direct path for leaks.
6. Compromised Ridge Caps
The ridge (peak) of your roof takes a beating because wind accelerates as it travels up the slope. We frequently find ridge cap shingles that have cracked or split right down the center. Since these cover the intersection of two roof planes, a failure here can leak into two different rooms at once.
7. Debris Buildup in Valleys
While not structural damage itself, debris piles prevent water from draining. When wind forces water to back up behind a dam of leaves or twigs, it can be driven underneath the shingles in the roof valley, bypassing your flashing completely.
Immediate Steps After Suspecting Damage
Finding damage can be stressful, but acting methodically can save your insurance claim.
1. Document Before You Touch
Snap photos of the damage from the ground immediately. We suggest taking “wide” shots to establish location (showing the house number if possible) and “tight” shots to show the specific damage. Insurance adjusters need this proof to validate the “Date of Loss.”
2. Secure the Interior
If you suspect a leak, go into the attic. Look for damp insulation or dark stains on the underside of the decking. Place buckets under active drips to prevent ceiling collapse, but do not try to patch the roof yourself during a storm.
3. Check Your Policy’s “Proof of Loss” Deadline
This is a critical insider tip: while Idaho’s statute of limitations for property damage is typically two years, many insurance policies have a much tighter deadline—often just 60 days—for you to file a “sworn proof of loss.” Don’t wait to file just because you think you have time.
4. Schedule a Professional Inspection
Ground observations are great for triage, but they miss about 50% of the actual damage. A proper roof inspection involves physically lifting tab edges to check for broken seals—something that should only be done by a pro with the right safety gear.
At Bork Roofing, our inspections are designed to generate the exact evidence insurance carriers require. We can help you understand if the damage warrants a claim or if a simple repair is more economical.
Proactive Measures to Fortify Your Roof
You can’t change the weather in Canyon County, but you can upgrade your defenses.
Upgrade to Class H Shingles
When it’s time for a replacement, don’t settle for the standard rating. We strongly recommend asking for shingles with an ASTM D7158 Class H rating. These are engineered to withstand uplift pressures from winds up to 150 mph, compared to the standard 110 mph (Class F) found on many builder-grade roofs.
Correct Nailing Patterns
The difference between a roof that fails and one that holds often comes down to two extra nails. In high-wind areas like ours, shingles should be installed with a 6-nail pattern rather than the standard 4-nail pattern. This effectively doubles the wind resistance of the shingle.
Regular Sealant Checks
Over time, the factory adhesive on your shingles can become brittle. Regular roof maintenance includes checking these bonds and hand-sealing loose shingles with roofing cement before a gust rips them off.
Do Not Wait for the Next Storm
Small wind issues have a nasty habit of becoming massive water issues overnight.
A single lifted tab can let in enough water to rot decking and ruin insulation, turning a $600 repair into a $12,000 renovation.
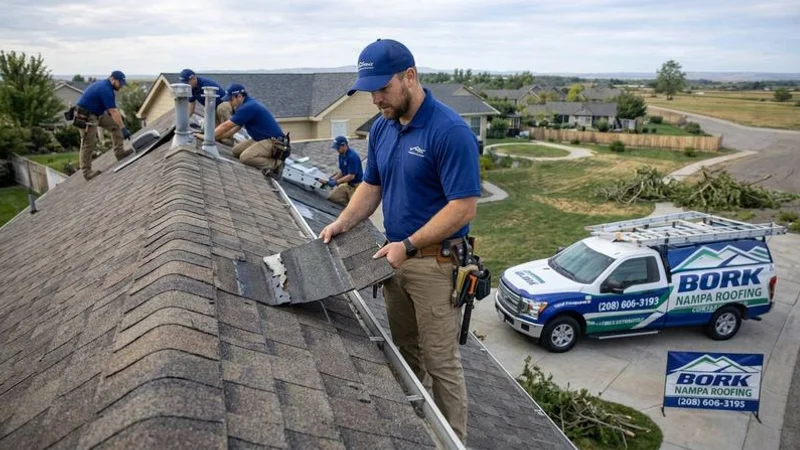
Bork Nampa Roofing Contractors offers comprehensive wind damage assessments for homeowners across the Treasure Valley. We know exactly what local adjusters are looking for and can help you navigate the storm damage repair process with confidence.
Call us at (208) 606-3193 or schedule your free inspection online. Let’s catch those problems while they are still small, invisible, and easy to fix.

Bork Roofing Team
Licensed Roofing Contractor
Licensed roofing contractors serving Nampa and the Treasure Valley.