Why Winter Roof Preparation Matters in Idaho
Idaho winters bring a specific set of challenges that go beyond simple cold weather. We deal with a freeze-thaw cycle in the Treasure Valley that is brutal on roofing materials. Temperatures frequently rise above freezing during the day and plummet at night from November through March.
This constant expansion and contraction creates stress points in your roof system.
Small cracks turn into gaping holes when water seeps in and freezes.
It is not just about the snow accumulation. The real danger lies in the ice that forms afterward. Without proper preparation, you risk facing ice dams, interior leaks, and structural fatigue.
Our team has seen repair bills for winter water damage exceed $10,000 for homes that could have been protected with a simple fall checkup.
A few hours of prevention now saves you from that panic in January. Whether you are in Nampa, Meridian, or Caldwell, this guide covers the specific steps to keep your home secure.
Step 1: Schedule a Professional Roof Inspection
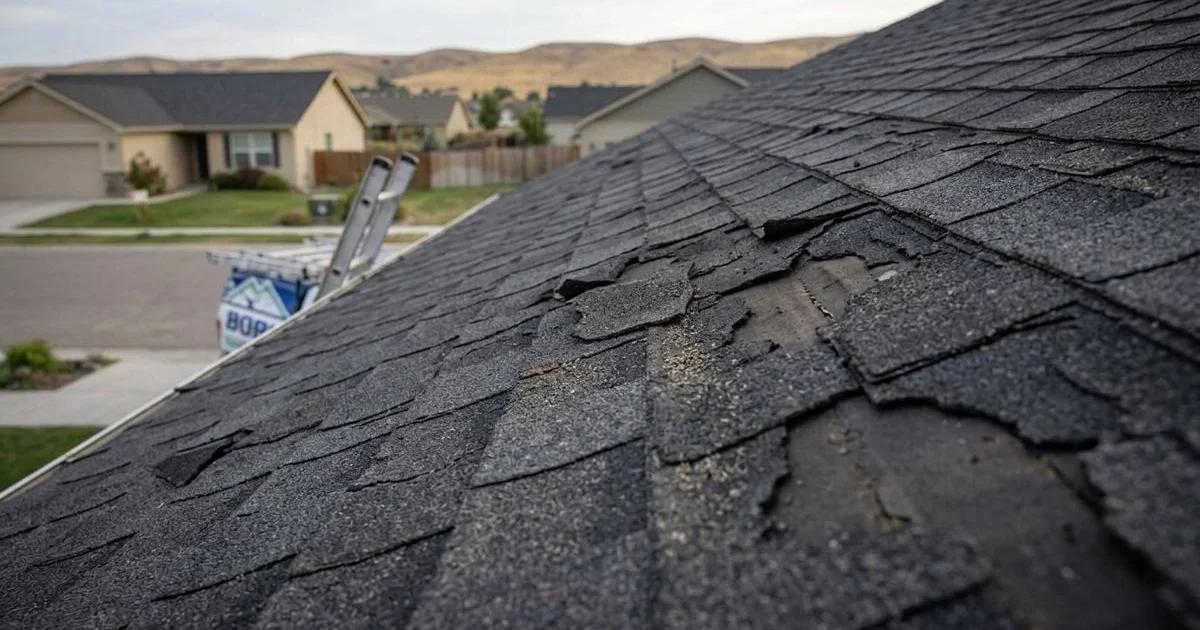
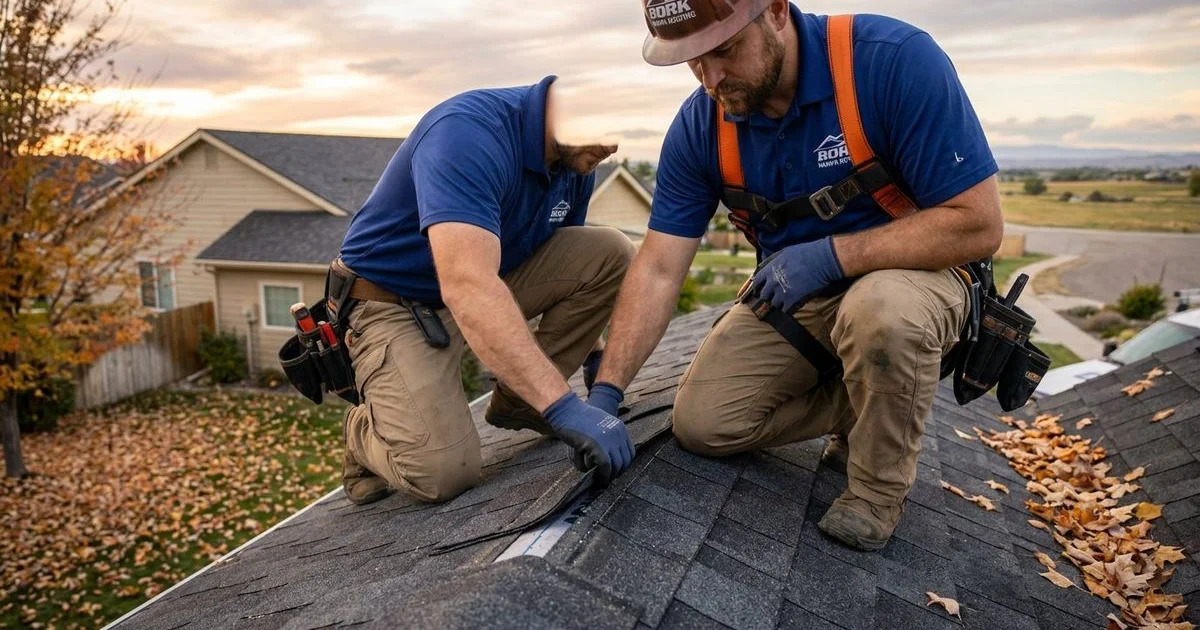
You should have a qualified contractor on your roof before the first hard frost hits. We know that spotting damage from the ground is nearly impossible for the untrained eye.
A professional gets up close to identify early warning signs like “blistering” on asphalt shingles or hairline cracks in tile.
What We Look For
During an inspection, we assess five critical areas that fail most often in Idaho winters:
- Granule Loss: Bald spots on shingles mean UV rays and ice will destroy the asphalt layer.
- Boot Failure: The rubber seals around plumbing vents often crack after 7-10 years.
- Flashings: Metal strips around chimneys must be flush and sealed to prevent water intrusion.
- Nail Pops: Small holes left by backing nails allow water to seep directly into the decking.
- Ventilation: Blocked vents lead to heat buildup and subsequent ice dams.
Addressing these minor issues now is significantly cheaper than an emergency callout. Most fall maintenance visits cost a fraction of a mid-winter leak repair.
Step 2: Clean and Inspect Your Gutters
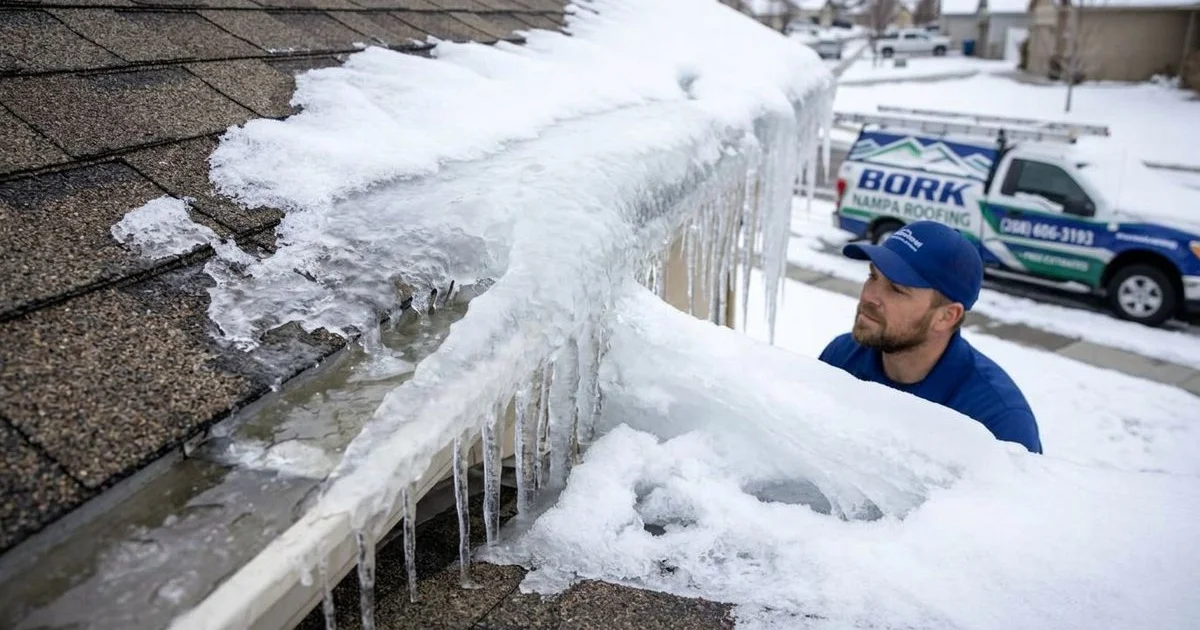
Clogged gutters are the primary catalyst for ice dams in our region. When we see a massive icicle hanging from a soffit, it usually starts with a gutter full of wet leaves.
Water needs a clear path to exit your roof system.
If debris blocks that flow, the water backs up, freezes, and forces its way under your shingles.
The Debris Management Plan
Here is the protocol we recommend for homeowners in the Boise metro area:
- Clear the Bulk: Remove all pine needles, leaves, and sludge.
- Test the Flow: flush the system with a hose to find hidden clogs in the downspouts.
- Check the Pitch: stagnant water indicates the gutter is sagging and needs re-hanging.
- Extend the Exit: ensure downspouts dump water at least 3 to 5 feet away from the foundation.
Cottonwood and Silver Maple trees are notorious in Nampa for shedding late in the season. You likely need to clean your gutters twice: once in late October and again in late November.
| Gutter Issue | The Winter Risk | The Fix |
|---|---|---|
| Loose Spikes | Heavy snow rips the gutter off the fascia | Install heavy-duty gutter screws |
| Poor Drainage | Ice builds up on walkways below | Add downspout extensions |
| Debris Dams | Water backs up under fascia board | Install high-flow gutter guards |
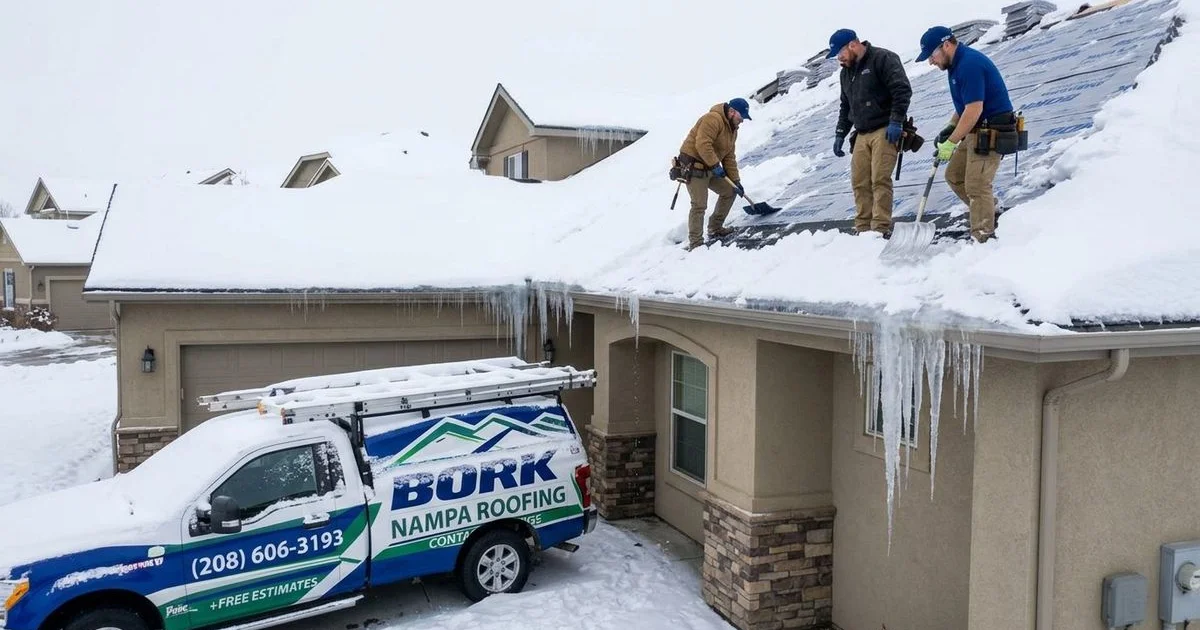
Step 3: Prevent Ice Dams Before They Form
Ice dams are not an ice problem; they are a heat problem. We explain to clients that dams form when your attic is too warm.
Heat escapes from the living space, melts the snow on the roof, and that water runs down to the freezing cold eaves.
It refreezes there, creating a ridge of ice that traps subsequent meltwater.
The Insulation Equation
Idaho building codes for our climate zone (Zone 5B) suggest specific insulation levels to stop this heat loss.
- Check Your R-Value: Your attic should ideally have R-49 to R-60 insulation. This equates to about 16-18 inches of blown-in fiberglass or cellulose.
- Seal the Bypasses: The gaps around light fixtures, bathroom fans, and chimneys are like open windows for heat. These must be sealed with expanding foam.
- Verify Airflow: Ensure your soffit vents are not blocked by insulation. You need cold air entering the eaves to flush out warm air through the ridge vent.
If you ignore this now, the resulting water damage can destroy drywall and insulation within days.
Step 4: Trim Overhanging Tree Branches
Heavy snow loads can snap healthy branches with surprising ease. We often see damage where a limb has crashed through a roof deck during a January storm.
Branches that hang within 6 feet of your roof act as a bridge for pests and a source of abrasive damage.
Wind whips these branches against your shingles, scrubbing off the protective granules.
Pruning Best Practices
- Create Clearance: Cut back any vegetation that physically touches or hangs over the roofline.
- Remove Deadwood: Identify and remove dead limbs that are brittle and prone to snapping.
- Protect the Tree: Make clean cuts at the branch collar to ensure the tree heals before deep winter.
This simple step also reduces the volume of leaves ending up in your gutters.
Step 5: Check Your Attic From the Inside
Your attic tells the true story of your roof’s health. We advise homeowners to go up into the attic on a sunny afternoon to look for trouble.
Turn off the attic lights and look for pinpoints of daylight.
The Attic Inspection Checklist
- Rusted Nails: If the nails poking through the roof deck are rusty, you have a moisture problem.
- Matting Insulation: Insulation that looks wet or compressed has lost its R-value and needs replacing.
- Black Stains: Dark spots on the wood sheeting usually indicate mold growth from chronic leaks or condensation.
- Frost Buildup: If you see frost on the underside of the roof in winter, your ventilation is failing.
Catching a leak from the inside often happens weeks before you see a stain on your living room ceiling.
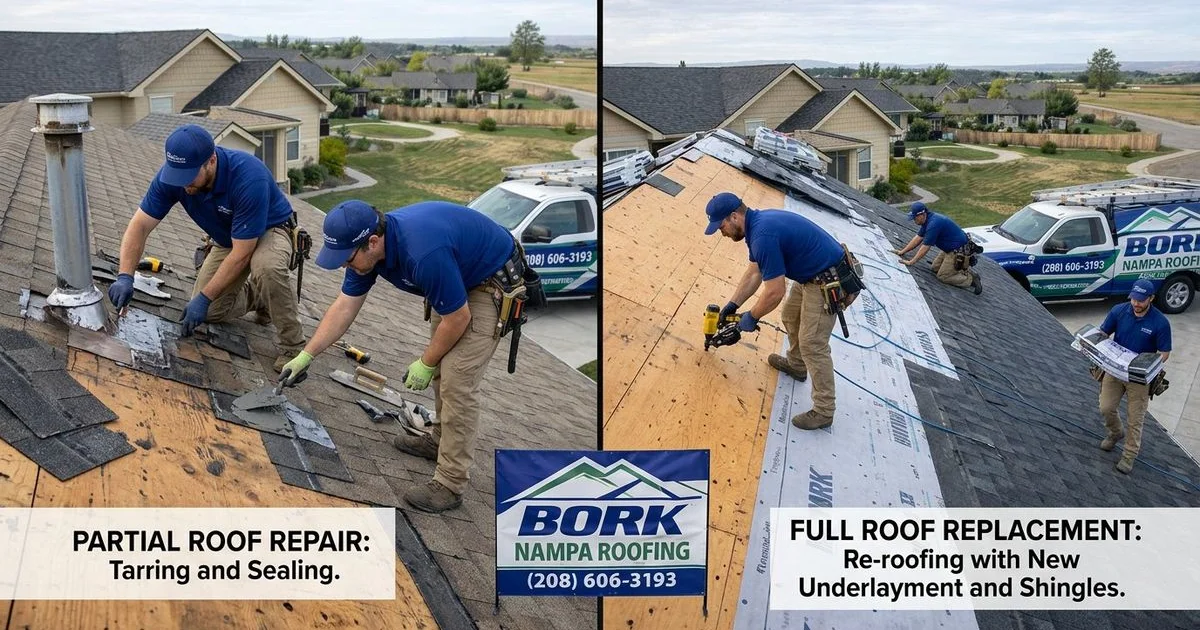
Step 6: Repair Damaged Flashing and Sealant
Flashing acts as the weatherproofing armor for your roof’s most vulnerable points. We find that the sealant (caulking) used on older repairs often dries out and cracks after a few hot Idaho summers.
Water is opportunistic and will find these microscopic cracks during a thaw.
Critical Areas to Seal
- Chimney Counter-Flashing: The metal embedded in the brick must be sealed tight.
- Skylight Kits: These are common leak sources; ensure the cladding is not bent or loose.
- Vent Collars: Check that the storm collars on HVAC pipes are tight against the pipe.
Repairing these seals requires a high-quality, exterior-grade polyurethane sealant, not cheap silicone.
Step 7: Consider Snow Load Capacity
The Treasure Valley occasionally gets hit with heavy, wet snow events. We construct roofs in Ada and Canyon counties to handle roughly 30 pounds per square foot (PSF) of snow load.
Most modern homes handle this fine, but older structures or patio covers are at risk.
When to Worry
Fresh powder is light, but wet snow and ice are incredibly heavy.
- Visible Sagging: If the ridge line dips in the middle, call a structural engineer immediately.
- Sticking Doors: Interior doors that suddenly jam after a snowfall indicate the house frame is under stress.
- Strange Noises: Loud popping or cracking sounds from the attic are a sign of structural movement.
If you have a flat roof or a low-slope patio, you must be diligent about clearing excess snow with a roof rake.
Your Idaho Winter Roof Checklist
We created this summary to guide your weekend preparation efforts:
- Book a professional inspection if you haven’t in the last 3 years.
- Clean gutters thoroughly after the last leaves fall.
- Check attic insulation depth (aim for 16+ inches).
- Seal air gaps around attic pipes and lights.
- Clear blocked soffit vents to ensure airflow.
- Trim branches back 6 feet from the roof edge.
- Reseal cracked flashing around the chimney.
- Scan the attic for daylight or rusted nails.
- Verify downspouts drain water 3-5 feet away.
- Monitor flat roof areas for sagging.

Do Not Wait Until the First Storm
Procrastination is the enemy of a healthy roof. We know that once the temperature drops below 40 degrees, shingles become brittle and difficult to work with.
Repairs that take an hour in October can take all day in December.
Investing time now prevents the stress of waking up to water dripping on your dining room table.
If you own a home in Nampa, Meridian, Caldwell, or anywhere in the Treasure Valley, let us handle the heavy lifting. Bork Nampa Roofing Contractors specializes in winter-proofing local homes. We identify the hidden risks that others miss.
Call us today at (208) 606-3193 for a free estimate and make sure your roof is ready for whatever Idaho winter throws at it.

Bork Roofing Team
Licensed Roofing Contractor
Licensed roofing contractors serving Nampa and the Treasure Valley.